|
|
Exporting .flex to .tiff on DRSCAnalysis2 |
Main Menu Procedures Page |
|
|
Exporting .flex to .tiff on DRSCAnalysis2 |
Main Menu Procedures Page |
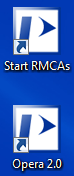
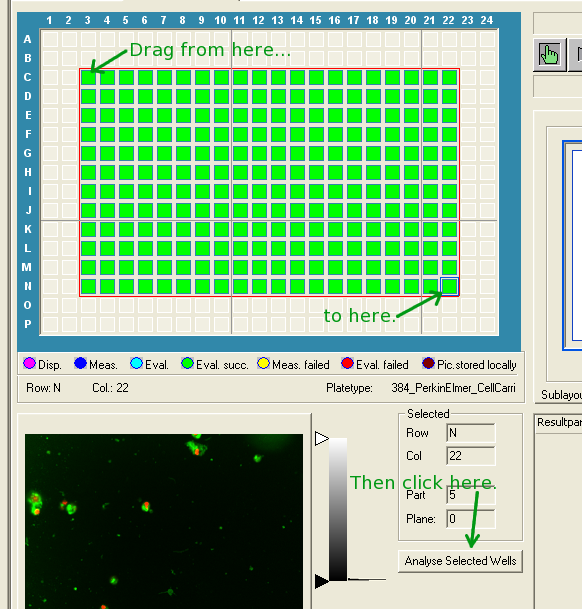
If they aren't already running, start the RMCAs and then start EvoShell (Opera) from the DRSCAnalysis2 Desktop.
The RMCAs are a group of programs that run in the background and fetch the images for EvoShell from their remote location. If they aren't running, EvoShell won't be able to find your data. Once it is running, you can minimize the Remote Cell Analyzer window and forget about it.
EvoShell/Opera is the program you'll be working with. It takes a while to start (around 1-2 minutes). You'll know it's fully ready when there are four green computer icons on the right side of the lower edge of the application window.
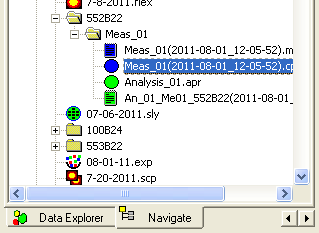
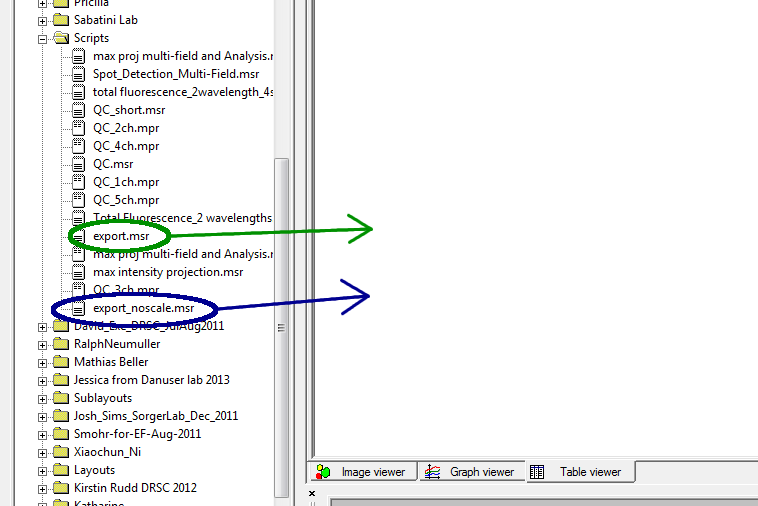
Switch to the Editor window (Window → Acapella Editor). In the editor, select the script you want to use for exports. How you do this will depend on the script you wish to run:

IMPORTANT: The destination specified by the
writeimage() statement in the export script is likely to be
invalid and will certainly not be the destination you
want. This is the one line in any export script that you
will always have to change. Change the destination to a
location on a disk with plenty of space where you want to
create the .tiff files. You should create a new subfolder
for each plate you are exporting (Windows slows down if you
put too many files in the same folder). Give the folder the
same name as the barcode of the plate.
NOTE: There is an older version of the writeimage()
statement, which has been commented out, above the current
line. Anything after "//" in the script is a comment (and
colored green in the editor). Make sure that you make
changes to the active version of the writeimage() line and
not the comment.
ALSO NOTE: Use forward slashes in the path name, not
backslashes. Remember the slash at the end of the path!
For example: If you have a portable drive that is
plugged into DRSCAnalysis2 as drive E: and you wish to
export your images to subfolders of a directory called
MyExports, your writeimage() statement should look like
this:
writeimage("E:/MyExports/" &
            sourcedata.barcode[0] & "/" & sourcedata.barcode[0] & "_"
            & substr("ABCDEFGHIJKLMNOPzzz", sourcedata.row[0], 1) &
            columnnum & "_S" & sitenum & "_W" &
            sourcedata.channel[i-1] & "_Z" & sourcedata.plane[i-1] &
            "_noscale.tif", "truecolor", imageformat="tiff",
            image=in_name)
That's very confusing, so let's break it down:
"E:/MyExports/"
is the location on your
disk where you will create the plate folders (more on that
below). Under normal circumstances, this should be the
only part of the line that you need to change.
sourcedata.barcode[0]
is the barcode of your plate. We use it twice, once for
the subdirectory name and once for the start of the file
name.
sourcedata.row[0]
is a numerical version of the row. So a well on row C
would have a value of 3.
substr("ABCDEFGHIJKLMNOPzzz",
                sourcedata.row[0], 1)
takes the row number and
converts it into a row letter, so that 1 becomes A, 4
becomes D, etc.
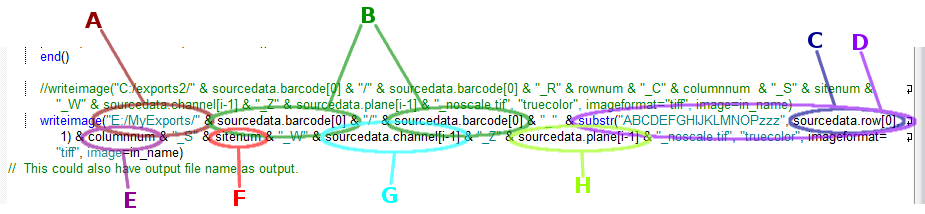
columnnum is a
two-character column number ("01", "07", "13", "24"
etc.).
sitenum is the
number for the site within the well (also two
characters).
sourcedata.channel[i-1]
is a number for the the laser channel (which is prefixed
with a 'W' for "wavelength").
sourcedata.plane[i-1]
is the Z-plane of the image.
The remaining portion of the line controls the file extension and sets parameters for how the image is exported, which we can ignore. (Select the export parameters you want by choosing between export.msr and export_noscale.msr.)
singlewell(channels=616)", "foreach
(1..616)"). Make sure that the larger number (616 in
the examples) is the same on both lines and is equal to or
greater than the total number of images in each well. This
number is the maximum number of images that will be exported
per well. If your experiment generated more images (ex. 30
sites, 3 wavelengths, 10 Z-planes = 30x3x10 = 900 images)
than the number specified, the script will silently leave
out the extra images.